A cron job is a linux specific command that is used for the scheduling of a request, command or script on your server that makes it convenient to automatically complete repetitive tasks. This assists in saving time for a webmaster when it comes to tasks that may otherwise take a big chunk of time to complete manually or small tasks that may need to be actioned on a regular basis. Cron Jobs are often used to execute scripts that modify files and databases, send out emails and notifications or run various different checks against files, directories and databases.
How It Works
Cron Jobs are powered by a crontab, also known as a cron table, file that specifies a shell command to run on a given schedule. Each line of a cron table file relates to a job which is composed of the Cron expression and an execution shell command. When setting up a cron job an option is provided to create a schedule that tells the shell command how often it should trigger and run the given command. These schedules can be as simple as once a day, once a week, once a month or more complex such as every 20 minutes during a Monday and a Wednesday.
How Do I Set One Up?
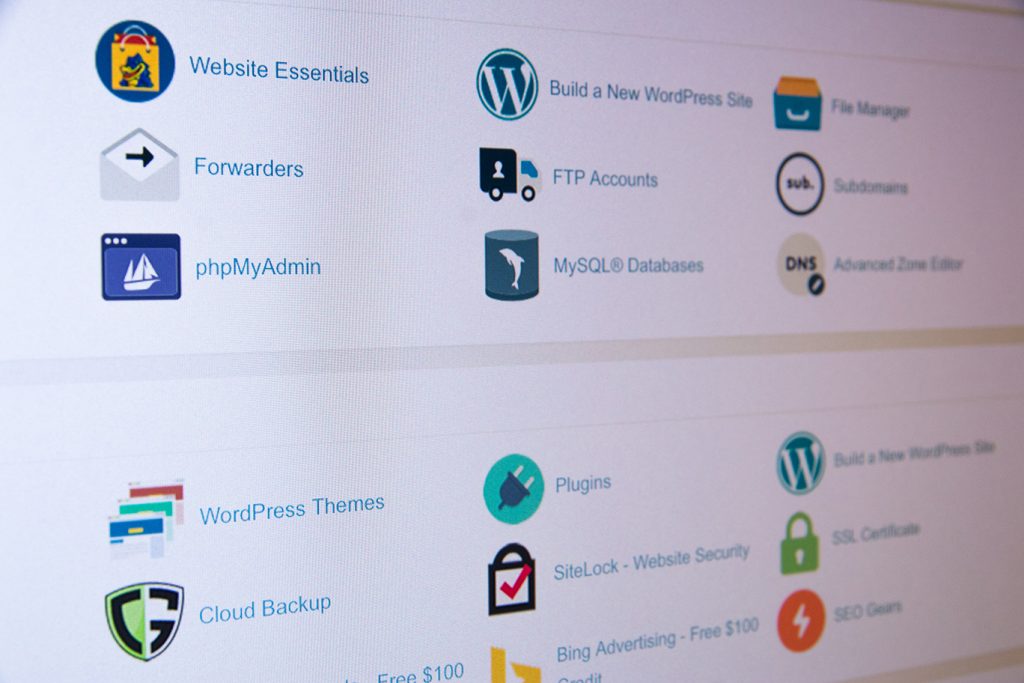
The setup and scheduling of a cron job can be completed with relative ease within cPanel based hosting environments via the use of the Cron Jobs graphical user interface. This allows you to quickly create crons with specific schedules without having to write your own schedule within a console.
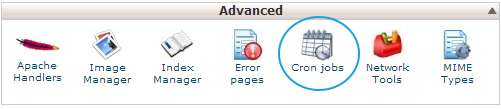
1. Locate The Cron Jobs Item Within cPanel
After signing into your cPanel account, scroll down the page until you come to the menu section titled as “Advanced”. Depending on your cPanel configuration, it may be collapsed which will mean you’ll need to click on the expand arrow in the right hand side of the title bar. Inside of the Advanced should be a calendar icon titled as cron jobs, click on this to open the cron manager.
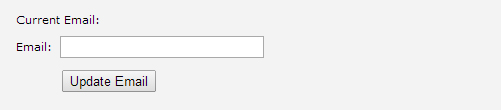
2. Set A Cron Email (Optional)
Before creating your Cron Job, you can elect to have an email sent to a chosen address to notify you each time the command is executed. Should you like an email be generated, simply place your prefered email into the blank field and click on the Update Email button.
3. Create A Schedule
Before entering a specific command or action a schedule first needs to be selected inside of the “Add new Cron Job” section. If you only need a basic schedule then you are likely to find one that meets your needs within the “Common Settings” drop down.
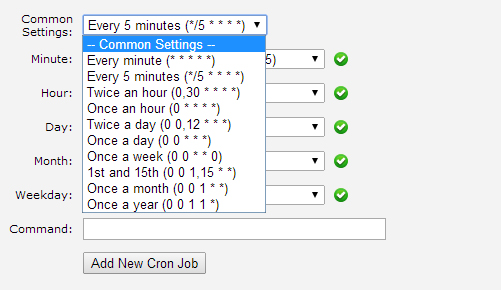
Otherwise, you can create your own schedule by manually selecting options for each variable – minute, hour, day, month and weekday.
4. Add Your Command
Once you’ve created a schedule you’ll need to enter your actual task into the command field. A good knowledge of Linux commands is essential to creating cron jobs effectively. If in doubt, ask your web developer or web hosting provider for support regarding the creation of a correct cron command.
As an example, should you want the cron job to execute a PHP script, you would add a command similar to the following within the “Command” field.
php -q /home/my/myfolder/scripts/myscript.php
The above finds the myscript.php within the directory and will execute it based on the schedule selected in the prior step.
Final Tips
The usage of cron jobs can prove to be invaluable for repetitive tasks that may otherwise take a considerable amount of time to complete manually. There are 2 tips that should be considered when creating your cron jobs to ensure they are compliant with your web host or assist in preventing high server loads, particularly on a shared web hosting service. In general, cron jobs should not be scheduled to execute any sooner than 5 minutes apart and it’s worth scheduling them to run during the night while also, if possible, at odd hours, e.g: 6:20 instead of 6:00.
Digital Pacific provides a range of affordable web hosting and dedicated server plans that will ensure your company has an online presence with a maximum level of reliability and availability.