Disclaimer: Any products/services mentioned or recommended below are suggestions based on our own experiences. We have no affiliation with any of the products or services mentioned and you should always thoroughly and independently research your options to decide what is best for you.
Welcome to the fifth piece of our 6-part series on how to optimise, protect, and maintain your cPanel hosting and WordPress website!
Check out the other parts of the series here:
– 5 Tips to Optimise your cPanel Hosting for WordPress
– 5 Tips to Protect your cPanel Hosting for WordPress
– 5 Tips to Maintain your cPanel Hosting for WordPress
– 5 Tips to Optimise your Wordpress Website
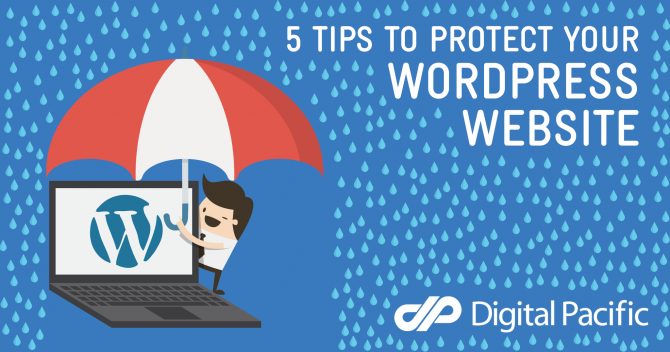
– 5 Tips to Protect your WordPress Website (you are here)
– 5 Tips to Maintain your WordPress Website
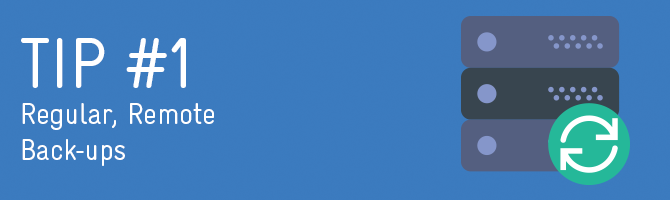
This is probably the most important aspect of owning a website. If you do not possess a backup of your website, you would need to be fully prepared to lose it and never see it again.
Many web hosting companies offer limited backups, however, these should never be relied on as a primary backup source, but rather a plan B should your own backups go astray. Digital Pacific, for instance, keeps 7 days worth of backups, taken every 6 hours. However, if you don’t notice there is an issue until 8 or more days after it first occurs, you could be just as stuck as someone who has no backups at all.
It is also important to have backups stored remotely – not on the same server or even the same network as your web hosting. Should your web host experience unexpected downtime to both their hosting servers AND their backup servers, this again leaves you stuck as you cannot then simply grab a backup and upload it to an alternative/temporary hosting environment until your server comes back online.
If instead you have your backups safely tucked away on your own completely separate storage service or a dedicated backup service, you can get yourself back online in no time.
The other consideration to note when choosing your backup strategy is the impact the backup process will have on your WordPress website. Some of the leading WordPress backup plugins can be very resource-hungry, and particularly in a shared hosting environment, they may exceed the resource limits of your web hosting package, causing a high backup failure rate.
An excellent backup solution would be ManageWP. This plugin not only stores your backups remotely but also processes and compiles the backups off-site, meaning the whole backup process bears little more impact on your site than a regular human visitor. This is a huge benefit over most other leading backup plugins which compile backups directly on your server, using up large amounts of precious resources and often making your site slow during the backup process. If there aren’t enough resources to keep the process going, it may fail completely, meaning you won’t have a backup for that time.
If resources are not a particular issue on your hosting plan however, then there are plenty of other highly reputable options to choose from which will also get the job done. To name a few; BackupBuddy, VaultPress and UpdraftPlus are all excellent options with various pros and cons to them and worth checking out further.
An SSL certificate is something that you can purchase and install on your website. Doing so will cause all of the data going between your visitors and your server to become encrypted and therefore unreadable by anyone who may be trying to hijack the data in-between. This could include things like your customer’s contact details when they fill in your contact form, or worse, their credit card details when they buy something from your store.
Having an SSL certificate installed will also give your website a green padlock or a “Secure” label in most modern browsers – just next to the URL in the address bar. This gives your customers a sense of trust that your website is secure, and that their sensitive data is being safely handled.
To install an SSL certificate, you have two options. If your host supports Let’s Encrypt, then you could enable this feature which will give you a self-signed SSL certificate. Otherwise, you can purchase an SSL certificate that has been signed by a trusted certificate authority. If you’d like to know more about the two types, and what the benefits of each are, you can check out our guide here.
If you’re leaning towards a Let’s Encrypt certificate and you are a Digital Pacific customer, you can put your feet up as all Digital Pacific Personal and Business hosting accounts have Let’s Encrypt certificates installed by default – just give your account up to 24 hours from time of creation (or from pointing your domain towards your Digital Pacific hosting) to have the certificate generated and applied. Then, simply set your website URL to use ‘https://’ and you should be good to go.
If you decide to purchase an SSL certificate signed by a trusted certificate authority instead, this quick and easy guide will step you through the process.
The first thing to never do with a WordPress website is set your administrator username as ‘admin’. This is the most commonly used username, and therefore the one that hackers and bots will try the most. It is always best practice to choose something a little bit different. If you’ve already set up your administrative user, you’ll probably find you cannot change the username anymore. In this case, you can simply create a new administrator and delete the old one. Just be sure that when you are deleting your previous administrator account, you choose to attribute all the content created by that user to the new administrator (otherwise you will lose it all!) – here’s a quick guide on how to delete a user without deleting all of their content.
Furthermore (and similar to a previous step in this series regarding strong cPanel, MySQL and OnePanel passwords), the final piece of the password puzzle is your WordPress administrator password.
Keep in mind that your WordPress login password isn’t accessible to your hosting provider, as it is stored as an encrypted value in your database.
To update your WordPress administrator password, first log in to your WordPress dashboard. Generally, this will be found at http://www.YOURWEBSITE.com.au/wp-admin (remember also to adjust the ‘.com.au’ as necessary to match what your domain is).
Once logged in, head to Users on the left-hand menu, then hover your mouse over your administrator account and click ‘Edit’. From here, scroll down until you find the ‘Account Management’ section where you should be able to click ‘Generate Password’. You can either use the password WordPress generates for you, or replace it with your own. Then, hit ‘Update Profile’.
Make sure to then update your Password Management software to store the new password.
Installing a WordPress security plugin can cover off a few more bases including additional brute-force prevention, malware scanning and an additional firewall more tuned to common WordPress attacks.
A very popular, not to mention free WordPress security plugin is WordFence. WordFence offers all of the above features with a few extras such as password auditing, live traffic views and source code verification. All of these features are fairly consistently offered among the leading WordPress security plugins. Two other extremely popular plugins would be Sucuri and iThemes Security, both of which are also worth looking into to see which option best suits your needs and budget.
Here’s a quick breakdown of what all of these terms mean:
Brute Force Prevention: Brute Force Prevention blocks suspicious failed login attempts to your WordPress login page, such as someone attempting to login with the default ‘admin’ username (which you should never be using!), someone using ‘forgot my password’ too many times, or simply getting the password wrong repeatedly. Any of these behaviours are a strong indicator of hackers or bots trying to gain access to your WordPress dashboard. Should a user/bot exhibit any of these signs, you can choose to either rate-limit how frequently they can load your site, block their IP address for a temporary amount of time, or if you wish, block their IP address permanently.
Malware Scanning/Source Code Verification: A good security plugin will regularly scan your website for any irregularities. It does this by comparing the code of your WordPress core, theme and plugin files against those found in the official WordPress Repository. If the scan notices any differences in the code, this could be a sign of foul play such as malware, code injections and backdoors. You will then be alerted and can determine if the difference is a safe one, or delete the contaminated file and download a new, clean version.
Firewall: A security plugin should offer a firewall that will protect your site from known exploits, even if your theme or plugins are vulnerable. It essentially monitors and identifies malicious traffic and stops it in it’s tracks, before any harm can be done.
Password Auditing: Password auditing is hand for sites with multiple or many users, as it checks the strength of user passwords and reports back on people who are using particularly weak passwords which may be compromising the overall security of your site, particularly if they are admin users.
Live Traffic View: Live traffic view can help you see hack attempts in realtime. This can be handy if you receive a security alert that something has happened – you can watch in real time where in the world the attempts are coming from, the offending IP address and even how long they are spending trying to break into your site.
WordFence’s free version will cover all of the above bases, though they also offer a premium version which gives you a bunch of extras such as:
Geo-tracking/Geo-blocking: If you notice a large volume of malicious traffic originating from a particular location, you can block the entire country to save your website significant strain.
Real-Time Threat Defence Feed: This means that your site will be protected from known exploits as soon as they are discovered, as opposed to up to 30 days after discovery with the free version.
Spamvertisement Check: The plugin will check if your site has been added to any blacklists for sending spam (which may be happening without your knowledge). Allowing this continue can have a severe impact on your SEO ranking, so it is important to be made aware right away and resolve the issue.
Two-Factor Authentication: Adding an extra layer to the login process of your site brings it a lot closer to being air-tight to unauthorised logins. This feature asks you for a randomly generated code from an app on your phone, in addition to your password, before you can log in to your site successfully.
Uptime monitoring is an important aspect of keeping your finger on your website’s pulse. Should your website go down, you probably will want to be the first to know, rather than having your potential customers letting you know – or worse, having them give up and leave.
There are several great uptime monitors available, usually either for free or a very modest fee. We would recommend looking for an uptime monitor that offers keyword monitoring, as this gives you an additional layer of protection. Keyword monitoring basically ensures that a certain phrase can still be found on your website. If it can be, this means that your website must be up. However, if your keywords or phrase suddenly can’t be found, it could mean that either your server has gone down, or your website has possibly been compromised/hacked to display something it shouldn’t be.
This is much better than only monitoring for a server response, as otherwise, your website may be busy displaying traumatising, full-screen viagra adverts for a week or two before you notice. Sure, during this time the website is technically up, but now it’s the very bad kind of up.
ManageWP, whom we mentioned at the start of this article as a great option for off-site backups, also offer an uptime/keyword monitoring service for only one extra dollar (USD) per month. Pingdom is also a very popular option in this field, as well as Uptime Robot if you’re on a smaller budget.
Check out the other parts of the series here:
– 5 Tips to Optimise your cPanel Hosting for WordPress
– 5 Tips to Protect your cPanel Hosting for WordPress
– 5 Tips to Maintain your cPanel Hosting for WordPress
– 5 Tips to Optimise your Wordpress Website
– 5 Tips to Protect your WordPress Website (you are here)
– 5 Tips to Maintain your WordPress Website
Feature Image Illustration designed by Freepik
Tip Image Illustrations designed by Piktochart